 This opinion piece was contributed by guest author Peter Suhm. Peter is a web developer from the Land of the Danes. He is the creator of WP Pusher and a huge travel addict, bringing his work along with him as he goes.
Laravel Forge is a server and application provisioning tool that was originally built to serve the Laravel PHP crowd. Recently, it has been made available to WordPress developers too, with the introduction of 1-click installs of WordPress on Digital Ocean, Linode and AWS cloud servers. In this post, I’ll give you a brief introduction to Laravel Forge and show you how you can use it to manage all of your WordPress installations in the cloud.
Laravel Forge is good news for WordPress developers
Because so many WordPress developers are used to managed hosting, the thought of running their own servers seem quite intimidating. That’s a shame with so many great cloud server companies offering virtual servers for very low costs. Unless your traffic is very heavy, a small ($5 to $10 per month) server can run quite a few WordPress websites. Laravel Forge takes care of provisioning your servers and can even setup your database and install WordPress for you. This makes cloud hosting much more available to WordPress developers at a low cost (Laravel Forge is $15 per month for unlimited servers), compared to many of the existing options.
Here are a few reasons why I think Laravel Forge is great for WordPress hosting:
- Your servers are configured in a secure way by default, with SSH authentication, firewalls, automatic security updates and free SSL certificates from Let’s Encrypt
- Your servers are going to be really fast with PHP 7
- You can run a lot of WordPress installs on 1 single server *
- You can scale your servers if you need more horse power *
* Goes for the cloud in general
Creating a new server
Here is how the “Create Server” screen looks in Forge:
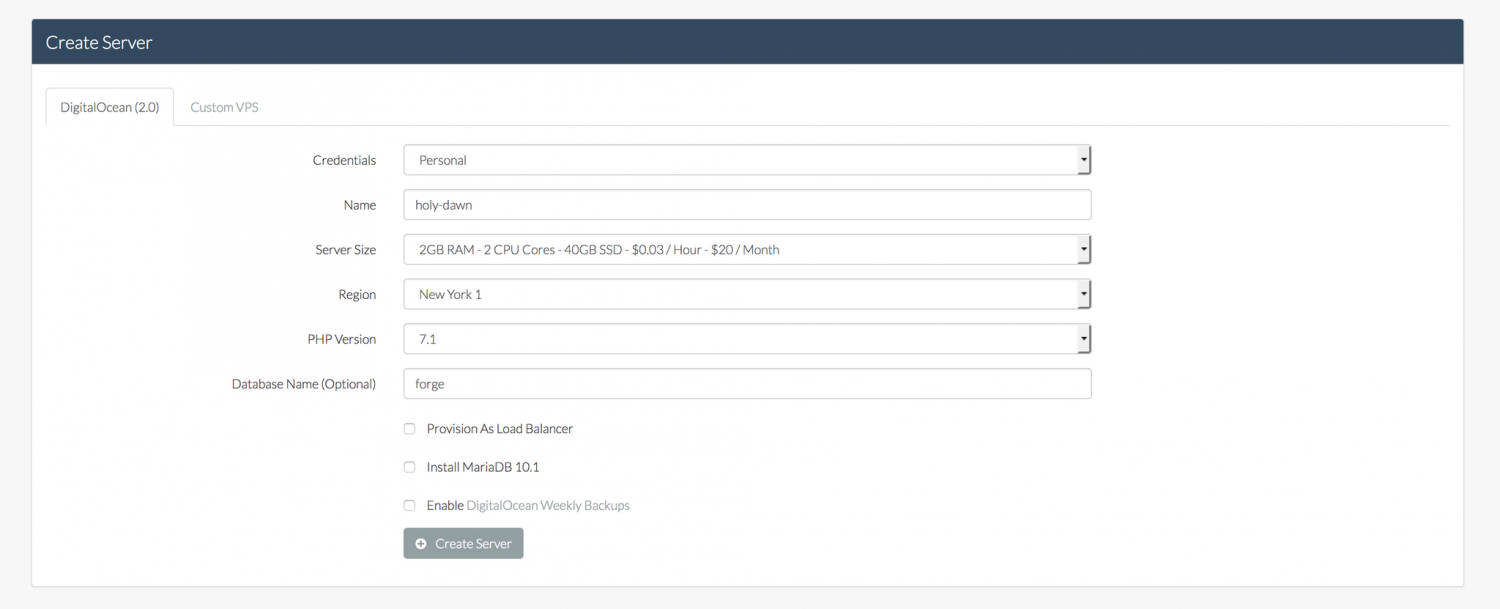
If you use Digital Ocean, Forge can also create your servers. If you use another provider like Linode or AWS, Forge can only do the provisioning part.
For Digital Ocean servers, here are the options you can configure:
- Which credentials to use, if you are managing multiple Digital Ocean accounts
- The server name
- The server size
- The server region
- The PHP version
- The default database name
You can then choose to:
- Configure the server as a load balancer (if you have really heavy traffic and is running WordPress across multiple servers)
- Install MariaDB instead of MySQL, which is a drop-in, faster replacement
- Enable weekly backups on Digital Ocean
When Laravel Forge is done with the provisioning, your server is ready to go.
Setting up a database
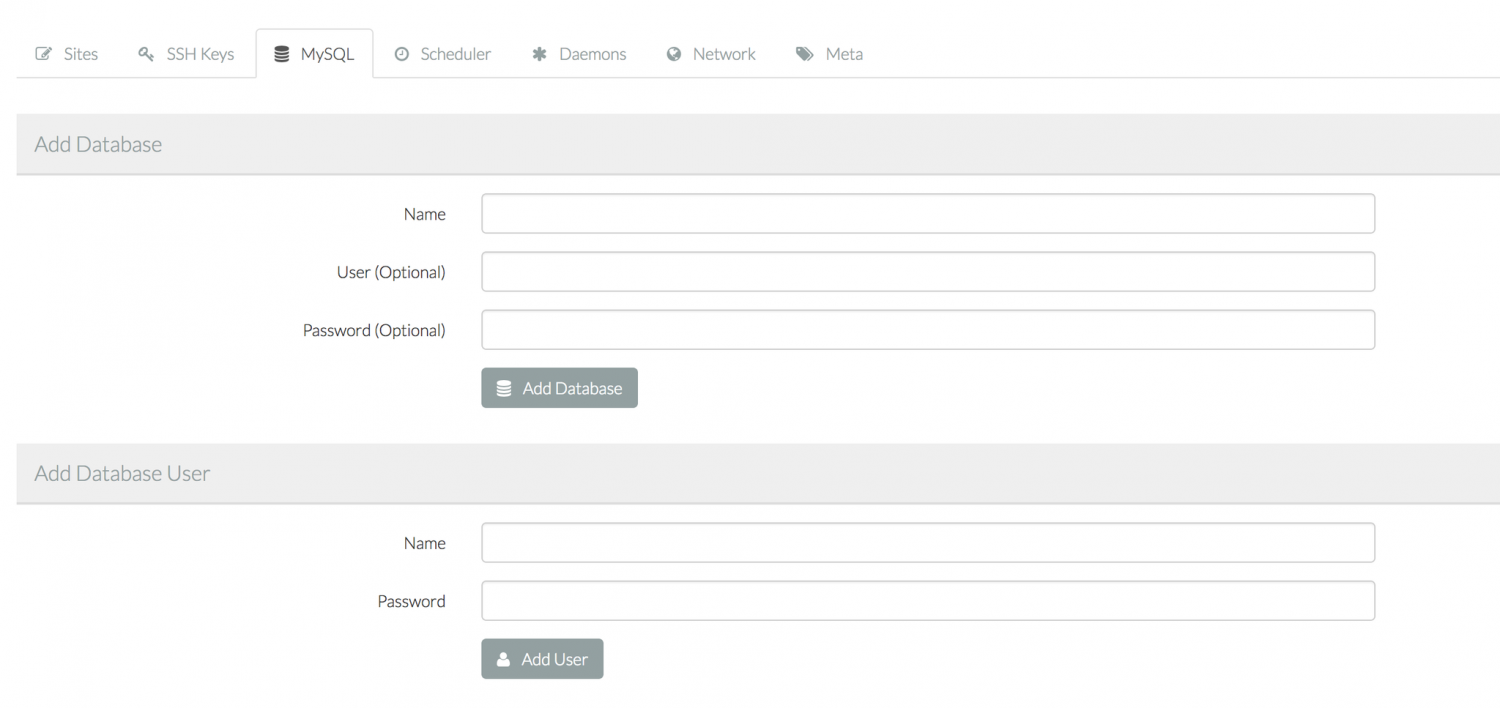
Once your server has been created, setting up a database for your WordPress installation is very easy. You can create the user at the same time you’re creating the database, or you can create the user afterwards.
Installing WordPress
Before you install WordPress, you need to create a new “site” on your server. You can just stick with the defaults:
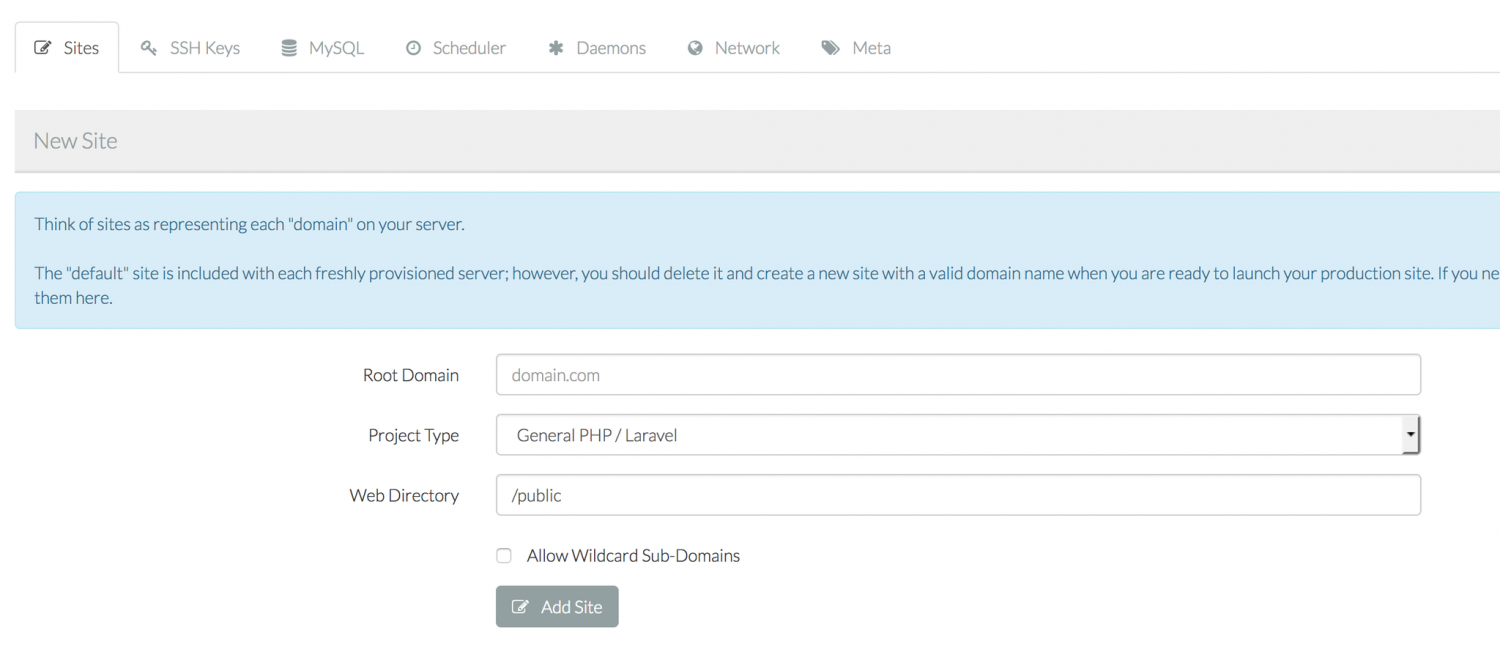
For the “Root Domain”, you need to add the domain name of the site you are setting up. Remember that you need to add a DNS record for your domain that points to the IP address of your newly created server. If you are just testing, you can always add a record in your computer’s hosts file with a test domain that points to your server. Something like this:
# /etc/hosts
# Replace xx.xx.xx.xx with your server's IP address

xx.xx.xx.xx wordpress-forge.test
Once you click the “Add Site” button, you will see a spinning wheel while Forge is setting up your site’s nginx configuration.
When the installation is done, you need to click the “Manage” icon next to your site in order to install WordPress. The first screen you will be presented with gives you the option to install an “App” on your site. Click the “WordPress” button, select your database and user from the previous step and relax while Laravel Forge completes the installation. Fun fact: Laravel Forge is actually using WP-CLI to install WordPress on your server.
When the installation has completed, visit your site in a browser and you’ll be met with something familiar:

Setting up a free SSL certificate
Finally, you should set up SSL for your WordPress site. It’s more secure and Google likes it!
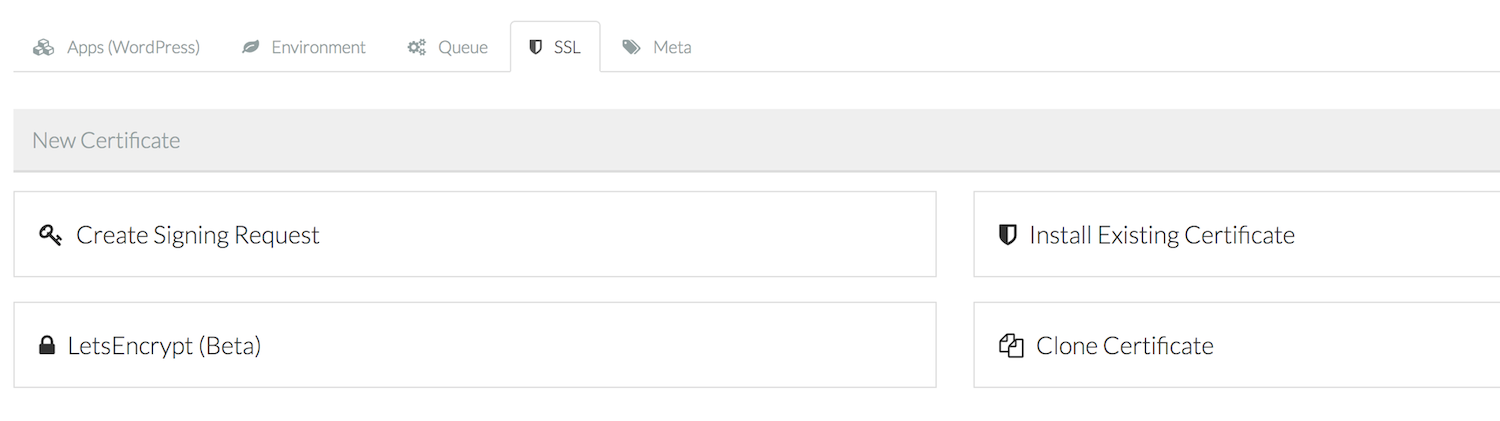
Head over on the “SSL” tab and click the “LetsEncrypt (Beta)” button. Click the “Obtain Certificate” button and wait while Forge creates and installs the certificate. Once the certificate is installed, click the “Activate” icon and voila! Your site is now all set up and secured with SSL.
That’s how easy it is to setup WordPress on a cloud server with Laravel Forge. I hope to see a lot of more products and tools like this that can help us building better, faster, and more secure WordPress websites. In fact, Laravel Forge was the original inspiration for my own product WP Pusher. I wanted to create a similar experience, but for WordPress plugins and themes instead.
Note on backups and security
Please note that even though Laravel Forge makes for a great starting point, ultimately you are the one in charge of the security of your servers. You should always try to educate yourself about security and have a backup strategy for your data.
so … is that some kind of Managed Server-like thingy? Or do you still have to take care of all that nasty tidbits, like properly administrating firewall settings (eg. iptables) etc.?
In the “Managed (Virtual) Server” case – great! I’m promoting that as well. It’s less expensive than a real server and everything is already taken care for. No more worries about obscure protection tools and ways, just get on with proper work and programming! :)
In the other case: So you are an administrator as well, no? If its fun to you, think about lots of folks – like me – who hate having to figure out this stuff all the time. Esp. if its NOT your main job, but work on the sidelines. Time wasted, which could be used more efficiently, like with figuring out why that bloody calll to this or that API doesn’t return the full amount of data records, and so on.
cu, w0lf.